Monday, April 28, 2008

Lession 11 - Color Mixing - Orange

The primary colors, red, blue and yellow, in theory can be used to mix every other color in the spectrum and artists should only need three tubes of paint. In practice this doesn't always work with the pigments artists have available, particularly when trying to mix bright, intense hues. Many artist's will use two yellows, two reds and two blues to be better able to mix bright colors. In this lesson we experimented mixing using various yellows, reds, and blues to see which gave the brightest secondary colors (orange, green and violet).

The next part of the challenge was to pick one yellow, one red and one blue and to reproduce the colors of a small still life set up of oranges matching the colors as closely as possible using only these three tubes of paint.


Judy's three primary choices are in the lower right.

Jake set her bright cut orange amid more muted fruit.

Marj was able to include some greens and violets in the shadows.

Thursday, April 24, 2008

Grandbaby Ezra


This is a little sketch I did of Baby Ezra.

Tuesday, April 15, 2008

Lesson 10 continuted - More Arches

We had a lot of fun with the arch problem. Below are several more studies.


Rosa played with arches and greenery.

Jan works with glazes to create wonderful layers of color.

Carol kept the corridor dark to show off the sunlit patio.

Bev took a whimsical approach and used the arches as a lead in to a cityscape.

Sunday, April 6, 2008

Lesson10 - Arches in Perspective

From time to time we have to review a bit of perspective theory. In this lesson we are concerned about drawing a convincing repeated shape which is receding from the viewer. I took a diagram from "The Big Book of Watercolor" by Jose Parramon which has a clear explanation of the principles involved.

The basic idea is to site along two receding horizontal lines until they meet at the vanishing point. Next divide the wedge in half lengthwise. You have to estimate the width of the first segment but the rest is easy. Simply draw a diagonal from the lower left of each segment through the midpoint of the opposite side. This line will hit the top at the right hand edge of the next segment.
Arches, like any repeating shape, make a wonderful design too. Here are paintings several artists came up with in an hour and a half.


Alice completely made up this painting after sketching in the arches.


Emily has two rows of arches receding to a central vanishing point.

Nancy incorporated shadows as part of the design.


Another Nancy created strong interest in the right side to keep the angled lines from taking the viewer out of the painting too quickly

Friday, April 4, 2008

Lesson 9 - Design Templates

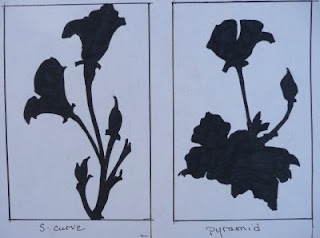
There are a variety of compositional formats artists use to organize material to make a strong design. In this exercise we took flowers and sketched them thinking about four possible design formats.
In an 'S-Curve' interest flows in curves from top to bottom . In a 'Pyramid' composition the viewer circles around withing the picture rectangle.

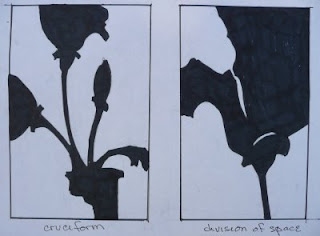
A 'Cruciform' design with touch all four edges. A 'Division of Space' composition is often used for close ups and relies on different sized spaces for interest.

This exercise is fun to do as a timed study. In this case we gave ourselves four minutes each to complete four 5"x7" small paintings in each of the compositional formats.


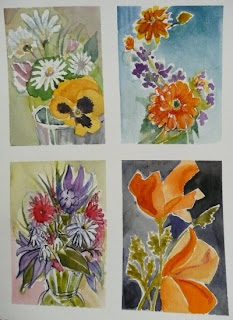
Kay came up with these small studies. And below are examples of each of the formats.

Bev created an interesting 'Division of Space' in this close-up.

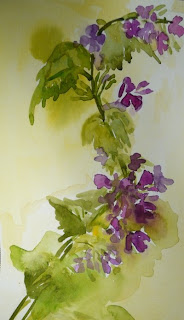
Carla let the flowers and leaves form an 'S-Curve'.

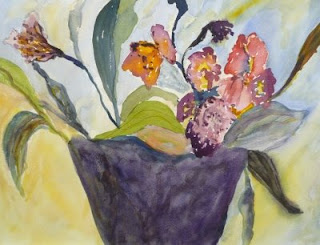
Dan incorporated an basket and created a 'Pyramid' design.

Selma came up with a 'Cruciform' arrangement.